How to obtain an electronic signature
Obtaining an electronic signature takes place in several stages:
- filling out an application;
- bill payment;
- submission of documents;
- obtaining a certificate.
The application can be submitted by phone or through the official website of the Kontur service center. An electronic signature is selected and paid for depending on the purpose of use. The minimum cost of a certificate for working on the public services portal is 1000 rubles. After payment, you must provide the office employee with documents. For legal entities and legal entities the list of documents is approximately the same:
- passport of the certificate holder;
- SNILS;
- original application;
- TIN.
When choosing a specific type of digital signature, the office employee will provide complete information about the documents and the number of copies. When receiving the certificate, you must have the originals of all documents with you, as well as a receipt for payment of the fee.
Certificate renewal
To renew your certificate, you must go to your personal account on the SKB Kontur website and fill out an application for reissue. If the owner’s (organization’s) data has changed or the certificate’s validity period has expired, then a complete re-set of documents is provided. A new certificate will be issued in due course. If the user applies in advance and his data has not changed, then the application for issuance can be signed with a valid certificate. Repeated submission of documents is not required when submitting an application.
What information is contained in the root certificate
What is a root CA certificate? This is a file where service information about the certification center is stored, indicating its validity date, service Internet address (through which you can contact the organization’s registry). All this data is provided in encrypted form, which CryptoPro CSP uses to verify the authenticity of an open personal digital signature.
The main purpose of the root key is precisely to verify the authenticity of the public digital signature key. In theory, a citizen’s open signature can be stolen, but using it without a certificate from a certification center will not work. That is, this whole scheme is made in such a way as to prevent the use of someone else’s digital signature by fraudsters or simply third parties.
How to start working with EP
After receiving an electronic signature, the user needs to configure the workplace. It includes:
- installation of a crypto provider;
- installation of certificate and keys;
- browser settings.
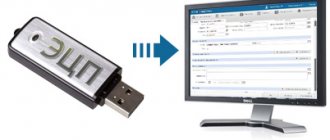
A cryptographic provider is a special software that implements all cryptographic algorithms. You can buy it on the official website of CryptoPRO, and installation using the bootloader prompts takes only a few minutes. The user receives an electronic signature certificate, public and private keys to it at the CA. They are usually stored on an electronic medium - a token. You can work with digital signature either from a token or by copying its contents to a separate folder on your PC. Next, you need to configure your Internet browser so that it allows you to carry out all operations with the digital signature. The standard setup includes installing plugins for Firefox, Opera, etc. Sometimes it is additionally required to install a CA certificate to verify its accreditation.
How to use digital signature in electronic documents
The signing process varies depending on the type of ED. If this is a specialized electronic document that allows you to embed the electronic signature into the body, then you need to download additional plugins. To work in MS Word versions older than 2007, the CryptoPro Office Signature plugin is required. In lower versions, the electronic signature is embedded in the document in operational mode. Signing files in PDF format is only possible through Adobe Acrobat. It allows you not only to embed, but also to verify the signature in the body of the document.
To work in non-formalized electronic signatures, you can create an electronic signature without embedding it in the body of the document. This type of digital signature is called detached, and it looks like a separate file. A detached signature is suitable for verifying files of any type and size. Typically, the CryptoArm application is used to create digital signatures. You can create a detached digital signature online on the Kontur.Crypto website.
Working inside information systems
Information systems (IS) include both web services and PC applications. The rules for using an electronic signature are individual for each case, however, there are a number of general requirements for all IP.
Working with electronic signatures is only possible with a correctly configured browser for a specific system. So, the ETP “Sberbank-AST” requires a Capicom plugin, and the State Services portal requires its own plugin. Interaction with the portal is carried out through its interface, and despite the fact that they may differ in appearance and functionality, they have the same operating principle: creating a document or uploading it, and signing an electronic signature. Using the plugin, the portal performs all the necessary operations (creating and verifying digital signatures), and the finished document is sent to the server.
Working with a marketplace is a little different. The user must additionally obtain accreditation and attach copies of the documents required for a specific ETP. All subsequent actions within this platform are confirmed by an electronic signature, and the information is stored on the ETP server.
Diskette
If you are using a floppy disk as the key container, you must complete the following steps:
1. Make sure that in the root of the floppy disk there is a folder containing the files: header, masks, masks2, name, primary, primary2. Files must have a .key extension and the folder name format must be xxxxxx.000.
If any files are missing or their format is incorrect, then the private key container may have been damaged or deleted. You also need to check whether this folder contains six files on other media.
2. Make sure that the “Disk drive X” reader is configured in CryptoPro CSP (for CryptoPro CSP 3.6 - “All removable drives”), where X is the drive letter. For this:
- Select the “Start” menu > “Control Panel” > “CryptoPro CSP”;
- Go to the “Equipment” tab and click on the “Configure readers” button.
If the reader is missing, you need to add it (see How to configure readers in CryptoPro CSP?).
3. In the CryptoPro CSP “Select a key container” window, select the “Unique names” radio button.
4. Delete remembered passwords. For this:
- Select the “Start” menu > “Control Panel” > “CryptoPro CSP”;
- Go to the “Service” tab and click on the “Remove remembered passwords” button;
- Oh and click on the “OK” button.
5. Make a copy of the key container and use it for work (see How to copy a container with a certificate to another medium?).
Free services for using digital signatures
SKB Kontur also offers its clients free services for working with digital signatures. The first one is web drive. It allows you to automatically configure a workplace for using digital signatures, and has a built-in license from CIPF CryptoPro.
Another free service is Kontur.Crypto. With its help, you can sign any electronic document outside a specialized system (ETP, Extern, Diadoc), check any electronic signature created in any program for signing documents, encrypt and decrypt an electronic document.
Installation on Linux
In modern Linux distributions, installing root certificates from certification authorities is no more difficult than in a Windows environment. You will need a file with the extension .crt, just double-click on it and select “Install” (you must confirm your choice by entering the user password).
If any problems arise, it is recommended to use the certmgr console utility. Installation of certification authority keys from the terminal is performed using the following command: certmgr -inst -store root -file <path to file with .crt extension>. After entering this command, you must also specify the Root password (since the file is integrated into the root partition of the disk).
Why doesn't the digital signature certificate pass authentication?
When working with the public services portal, using a special plugin, the electronic signature is checked for qualification and validity, as well as the correct filling of all fields and forms. If during the verification process it is discovered that one of the required details is not filled in, then the port classifies the certificate as not qualified. Then a check is made to determine whether the CA has accreditation, the validity period and status of the certificate. If the certificate has expired or has been revoked, or if it was issued by a certification center without accreditation by the Ministry of Telecom and Mass Communications, then the verification will not be passed.
To obtain an electronic signature from SKB Kontur, you must fill out an application, pay a fee and collect the necessary documents. On average, the certificate is issued within 2-4 days after confirmation of payment. To work with props, you need a simple workplace setup, which includes installing a crypto provider and special plugins. Each of them is selected for a specific information system. SKB Kontur also offers its clients free opportunities for using digital signatures: a web disk and a web service for signing and verifying digital signatures. To use them you need to register on the official portal.
Electronic signature validity period
First, let's look at how long an electronic signature is valid. According to the norms of Federal Law No. 63 (dated 04/06/2011), an electronic digital signature is issued by a certification center (CA) for work on commercial sites for one calendar year. Restrictions on the validity period of an electronic signature are related to ensuring that the state register always contains only current information about the owners of the electronic signature. When users submit a request for their extension, a mandatory double-check of the documentation occurs.
The limited validity period of the digital signature is also established for security purposes for the signatory and other participants in the document flow. A request to renew a digital certificate confirms that it has not been lost and is still in the holder's possession.
Important! The validity period of the digital signature may be terminated earlier than 12 months from the date of issue, when the CA that issued it closed. In such cases, users are notified in advance. The owner can no longer renew the digital signature - he needs to get a new one from another CA.
- Rutoken EDS
1 review
2 900 ₽
2900
https://online-kassa.ru/kupit/rutoken-etsp/
OrderMore detailsIn stock
- Electronic signature
10 reviews
2 900 ₽
2900
https://online-kassa.ru/kupit/elektronnaya-podpis/
OrderMore detailsIn stock
- Electronic signature for EGAIS
2 900 ₽
2900
https://online-kassa.ru/kupit/elektronnaya-podpis-dlya-egais/
OrderMore detailsIn stock
Setting up Internet Explorer
Correct auto-configuration requires the use of version 10 of the Internet Explorer browser. Otherwise, a program on a 32-bit architecture, version lower, can be used.
The file for launching the 32-bit version is located in the root directory of the browser in a folder with an x86 index.
If you are using the Windows 10 operating system, it is recommended to double-check that the browser you are launching is Internet Explorer and not Microsoft Edge.
Instructions for setting up the browser:
- Go to the browser, then to “Tools” - “Browser Options” - “Security”.
- Select “Trusted nodes” - “Nodes”.
- Disable the option “All hosts in this zone require server verification.”
- In the “Add the next node to the zone” cell, indicate the current ETP address.
- Specify the web address of the resource using the following pattern: “https://*.kontur.ru/”.
- Complete the operations by clicking “Add” - “OK”.
Additionally, you need to change the parameters in the “Trusted nodes” cell, in particular:
- Go to “Tools” - “Internet Options” and “Security”.
- Go to “Trusted nodes” - “Other”.
- In the “Active-X controls and connection modules” parameter, set the slider to the active state (enable).
In some cases, the system will automatically download the required software; however, you may need to install the CAPICOM-KB931906-v2102 files.
For some resources, the installation of additional components is required (KriptoPro EP browser Plug-in).
