Filling out part 2 of form 6-NDFL still causes difficulties for users. Register Tax accounting for personal income tax and specialized reports on personal income tax cannot always help in finding errors, since not all data stored in the register is used there Calculations of taxpayers with the budget for personal income tax.
After reading this article, you:
- learn how to use the Universal Report to check the correctness of filling out Part 2 of Form 6-NDFL and determine what actions need to be taken so that the data in the report is reflected correctly;
- receive a link to the ready-made setup Checking the completion of Part 2 of 6-NDFL for use in your program.
Who submits Form 6-NDFL
The Law “On Amendments to the Tax Code of the Russian Federation” dated May 2, 2015 No. 113-FZ established for tax agents paying income to individuals the obligation to quarterly report to the Federal Tax Service on the amounts of tax withheld from such income (clause 2 of Article 230 of the Tax Code of the Russian Federation in version of Law No. 113-FZ).
This regulatory act also provided for the procedure for approving reporting forms assigned to the Federal Tax Service of Russia. As a result, the Federal Tax Service of Russia issued an order dated 10/14/2015 No. ММВ-7-11/ [email protected] , which introduced Form 6-NDFL for Russian taxpayers, mandatory for use from 01/01/2016.
From 2021, they plan to combine 6-NDFL with the 2-NDFL form. ConsultantPlus experts spoke about the planned innovations. Get trial access to the K+ system and go to the Review material for free.
Deadlines for submitting 2-NDFL certificates in 2021
Previously, the deadlines for submitting certificates in form 2-NDFL depended on what feature was indicated in them:
- if “1” or “3”, then the certificate had to be submitted no later than April 1 of the year following the reporting year. This sign indicates that personal income tax has been withheld and transferred to the state budget in full;
- if “2” or “4”, then the certificate had to be submitted no later than March 1 of the year following the reporting year. This sign indicates that personal income tax could not be withheld and, accordingly, transferred in full.
Important! From 2021, regardless of what feature is indicated in the 2-NDFL certificates, documents must be submitted no later than March 1 (Federal Law of September 29, 2019 No. 325-FZ). Since this day falls on a Sunday in 2021, the deadline is moved to March 2, 2021.
If the tax agent does not submit 2-NDFL certificates within the established time frame, he faces administrative liability in the form of a fine in accordance with clause 1 of Art. 126 of the Tax Code of the Russian Federation. Its size is 200 rubles. for each document not submitted. For example, if a company has not submitted information on 100 employees, the fine will be equal to 20,000 rubles.
In addition, if the tax inspectorate finds false information in the 2-NDFL certificate, then a fine will be imposed under clause 1 of Art. 126.1 Tax Code of the Russian Federation. According to this norm, it will be 500 rubles. for each document that contains incorrect information. However, a fine can be avoided if the tax agent independently discovers the error and submits a 2-NDFL correction certificate before the tax office itself identifies the violation.
Formation of 6-NDFL in “1C: ZUP” (“Salaries and personnel management”)
1C developer specialists quickly responded to changes in legislation and supplemented the releases with a new reporting form. Like all other tax reporting forms in 1C, after the reporting period, 6-NDFL can be filled out automatically using software. Let's consider this process using the example of “1C: ZUP” (3.0).
To generate 6-NDFL in 1C: ZUP in the main menu “Reporting. Certificates" you should select "1C - Reporting", then the "Create" item and in the drop-down menu "6-NDFL".
In the window that appears, to fill out 6-NDFL, you must select an organization and indicate the period for which the report is generated.
NOTE! Under the fields to be filled in in the 6-NDFL window you will see information about the edition of the form that the program will fill out. In the future, in case of changes, in order to create a correct report, you will need to track the correct edition of the form.
Press Enter and you will be taken to the form page. We check the data (in addition to information about the organization and period, the type of report (primary or corrective), date of signing, etc. will also be visible). Then click “Fill”, and “1C” transfers the data from the personal income tax accrual registers for the reporting period to the form. The draft report is ready!
It remains to check it. This can be done manually by generating a payslip for the same period in the same “1C”. If the report is filled out correctly, the indicators in lines 020 “Amount of accrued income” and 040 “Amount of calculated tax” in 6-NDFL must coincide with the totals in the columns “Total accrued” and “Total withheld” in the payroll statements for the same period.
Correcting errors for generating 6-personal income tax is a separate, extensive issue. In this article we will not dwell on it in detail. We only note that if discrepancies are found during reconciliation with the payroll sheet, then the 6-NDFL project has a line decoding function available. To do this, place the cursor on the desired line (for example, 020) and either double-click on it with the left mouse button, or press the right mouse button once and select “Decrypt” from the drop-down menu. It is convenient to check the resulting decoding with the payroll sheet to identify differences.
For information on sending a report to the Federal Tax Service via electronic communication channels, read the article “Is it possible to fill out form 6-NDFL online?” .
Setting up a Universal Report
The universal report in the program is located in the Reports - Standard reports - Universal report section.
Filling out the report header
In the header of the report please indicate:
- Period —the period for compiling the report;
- Accumulation register - type of data source;
- Taxpayers' settlements with the budget for personal income tax - the name of the register in which the data of taxpayers' settlements for personal income tax is stored;
- Basic data - register data Calculations of taxpayers with the budget for personal income tax .
Setting up the report
Open the report settings using the Settings . Select View - Advanced .
The extended report view allows you to work with special tabs:
- Selections;
- Fields and sorting;
- Decor;
- Structure.
This helps you customize the report as flexibly as possible to suit your conditions.
For the report Checking the completion of Part 2 6-NDFL, fill in the tabs:
- Selections;
- Fields and sorting;
- Structure.
Tackles tab
On the Screenings Add screening button to indicate the period of income generation, for example, for 1 quarter. 2021:
- 1st line: Field - Date of receipt of income , Condition - Greater than or equal to , Value - 01/01/2019 .
- Field - Date of receipt of income , Condition - Less than , Value - 04/01/2019 .
- Field - Payment deadline , Condition - Not equal , Value - not filled in.
Click the Show and select the Show In report header .
Qualifications tab looks like this:
If the database keeps records for several organizations, you can add a 4th selection line:
- Field - Organization , Condition - Equal to , Value - organization for which the data is being checked. PDF
Fields and sorting tab
On the Fields and Sorting , in addition to the default indicators, use the Add to set the following indicators:
- Registrar;
- Take into account paid income in 6-NDFL;
- Transfer deadline;
- Payment deadline;
- Amount of income paid.
Use the up and down arrows to arrange the fields in order. For a more compact report form, leave the checkboxes only on the following indicators:
- Type of income;
- Resident tax rate;
- Registrar;
- Take into account paid income in 6-NDFL;
- Transfer deadline;
- Payment deadline;
- Amount of income paid;
- Sum.
In the Sorting Add button to specify the data ordering system in the report:
- Date of receipt of income - Ascending ;
- Individual - Ascending . _
Structure tab
The initial report structure contains only detailed records. To build your own report structure, remove the default setting by clicking the Delete .
Click the Add to set the fields to be grouped, as shown in the figure.
Where to find and how to fill out 6-NDFL in “1C 8”
The standard place for 6-NDFL in 1C 8 is: “Reports” - “Regulated reports” - “6-NDFL”. Sometimes a report may suddenly get lost, then you should also look for it in the “Regulated Reports”, but in the general “Directory of Reports”. In the directory, check the box next to 6-NDFL and click “Restore” in the top menu. The report will return to its normal location.
The algorithm for creating and filling out a new report is similar to that described above for “1C: ZUP”.
Check whether you filled out Form 6-NDFL correctly with the help of explanations from ConsultantPlus. Study the material by getting trial access to the K+ system for free.
Information in the 2-NDFL certificate
The 2-NDFL certificate, intended for transmission to the tax authorities, contains the following information:
Title page
It contains:
- basic information - certificate number, reporting year, attribute, adjustment number, Federal Tax Service code, name of the organization, OKTMO code, telephone number, as well as information on the reorganized company;
- section 1 - information about an individual (TIN, full name, taxpayer status, date of birth, citizenship, ID code, series and document number);
- section 2 - information on the total and taxable amounts of income, as well as the amount of personal income tax (calculated, withheld and transferred);
- section 3 - information on standard, social and property deductions (deduction codes and amounts, as well as code, number and date of notification from the tax office);
- additional information - who exactly confirms the accuracy and completeness of the information, as well as the date the document was generated;
Application required to indicate income and deductions by month
The application states:
- reference number;
- reporting year;
- personal income tax rate;
- month;
- income or deduction code;
- amount of income or deduction;
- date of document generation.
Important! If the certificate is generated for an employee, then it does not contain an application for breaking down information on income and deductions by month. The rest of the information is filled out in the same way as in the 2-NDFL certificate for the tax office.
Nuances of 6-NDFL in “1C 7”
Initially, there were no plans to release updates to the “seven” at all in order to encourage users to switch to the “eight”.
As a result, in the “seven” 6-personal income tax is not automatically generated. That is, there is a report form and the ability to download it, there is data on payments and deductions entered into the general registers, but they need to be filled out and checked manually, in accordance with the explanations of the Federal Tax Service on filling out 6-NDFL, set out, among other things, in letters dated 12.02. 2016 No. BS-3-11/ [email protected] and dated 02/25/2016 No. BS-4-11/ [email protected]
Find out how to maintain a tax register for filling out 6-NDFL in the article “Sample of filling out a tax register for 6-NDFL” .
Let's remember the theoretical aspect
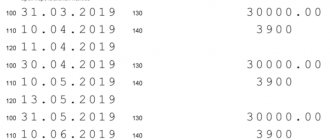
| Type of income | Line 100 Date of actual receipt of income | Line 110 Personal income tax withholding date | Line 120 Deadline for transfer of personal income tax | |
| Salary (income code 2000, 2530) | Prepaid expense | The last day of the month for which income is accrued | ||
| Monthly salary | ||||
| Calculation of severance | Last day of work in the month of dismissal for which income was accrued | Pay day | The day following the day of payment of income | |
| Vacation pay (code 2012) temporary disability benefit (code 2300) | Pay day | Pay day | Last day of the month of payment | |
| Income in cash | Pay day | Pay day | The day following the day of payment of income | |
| Income in kind | Day of transfer of income in kind | The nearest day of payment of income in cash | The day following the day of payment of income | |
| Excess daily allowance | The last day of the month in which the advance report is approved | |||
| Material benefits from saving on interest when receiving borrowed funds | The last day of each month during the period for which the borrowed funds were provided | |||
What is the main mistake when we keep records in ZUP, UPP, KA? We don't keep track of income payment dates, but they are very important!
Checking and sending 2-NDFL
To check and send the certificate you need to do the following:
- Select from the listed documents those certificates that need to be sent.
- Click on the blue button to check the report and send it further.
- Indicate whether the person signing the document has managerial authority.
If the signatory does not have the authority of a manager, a power of attorney must be issued to him, giving him the authority to sign. You need to fill out a “Representation Notice” . It can be filled out in the “Details and Settings” .
- When the check is finished:
- If there are no errors or warnings, you can send the document by clicking “Send to the Federal Tax Service”:
- If errors , they will need to be corrected. First, you should familiarize yourself with them (button to show scan results). After this, you can return to the list of documents (button “Edit certificates” ) to make edits. When all the necessary adjustments have been made, you can resend.
- warnings should also be checked, although correcting them is not mandatory. In the verification section, you can download a document with an XML extension, send it to print, or calculate the amounts to compare them with 6-NDFL.
- When the user clicks “Send” to the Federal Tax Service , the document is signed with his unique digital signature and then sent to the Tax Service. To view the list of documents that have already been sent, on the main page you need to select “Federal Tax Service” , then “Sent reports” .
Algorithm of user actions
Any manipulation performed in the machine requires attentiveness and coordination of the stages. So our case implies a certain procedure and we will study it further.
Step 1 – The create button will help you define a new reporting form.
Step 2 – In the report types, find the 6-NDFL we need and then click select.
Step 3 – In the window that opens, enter the desired company, when accounting for several, the reporting period and click on create. Please note that if there are separate divisions for which a separate balance sheet is not maintained, the report form must be different for each such division.
Step 4 – So that you can make a report to several tax departments at once at the place of registration, there is a flag to create for several tax authorities. Afterwards, it is worth noting the tax authorities and registering those with which the company and its separate divisions are registered and where the reporting needs to be sent. As a result, you will receive a tax calculation based on the reporting form. But be sure to go into each one and check that the calculations are correct.
Step 5 - On the title page in the field at the location (accounting) (code) you are required to enter the code for the place of submission of the calculation and for domestic companies it is 220. You have the right to turn on an automatic report and do it yourself, then for the main and subsidiaries you you do a separate calculation of the handicap and in the column Submitted to the tax authority (code) with the filling command you assign the calculations.
Next, I want to tell you how to compose each section of the report we are studying.
Register Print
You can print the register from the page on which the list of certificates is located. The operating algorithm is as follows:
- Select the employees for whom printouts are needed.
- Click "Actions", then "Print register".
- When a new window opens, you need to choose which format to use: in accordance with the order of the Federal Tax Service or in the form of an extended summary table.
- The automatically entered register number and date should be checked and, if necessary, changed.
After clicking on the link “Download Excel file” or “Download PDF file” (the second option is available only if you select the option according to the order of the Federal Tax Service), the download of the file will begin, which must be opened and sent to print. The register can also be printed from the page with the test results. To do this you need:
- click “Print register”;
- when the pop-up window opens, select the format: according to the order of the Federal Tax Service or in the form of a summary table;
- check and, if necessary, change the register number and date;
- Click on the link “Download Excel file” or “Download PDF file” , the download of the file will begin, which you need to open and send to print. PDF is available only if you select the option according to the order of the Federal Tax Service.


